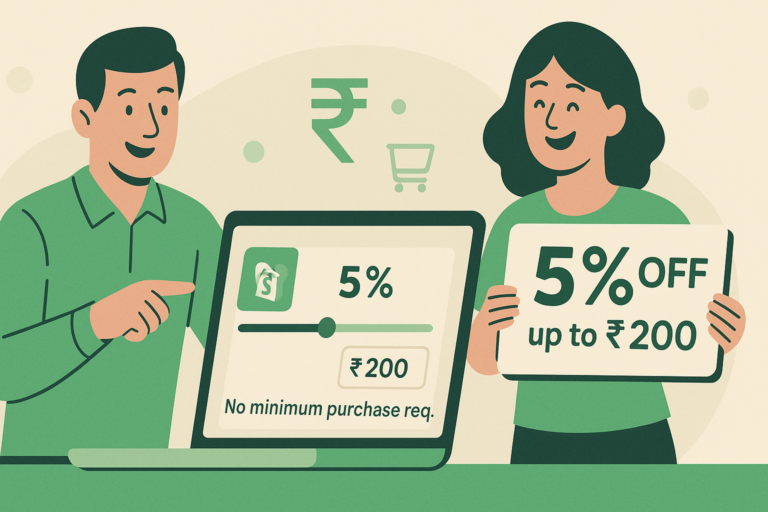
Offering a 10% discount with a maximum cap of ₹300 for orders above ₹2,000 is a great way to encourage higher-value purchases while maintaining control over your discounts. This guide will help you set up Shopify discount using the Nex Discount Cap & Limit.
Follow these step-by-step instructions to configure the discount properly.
Table of Contents
Step-by-Step Instructions to setup Shopify discount
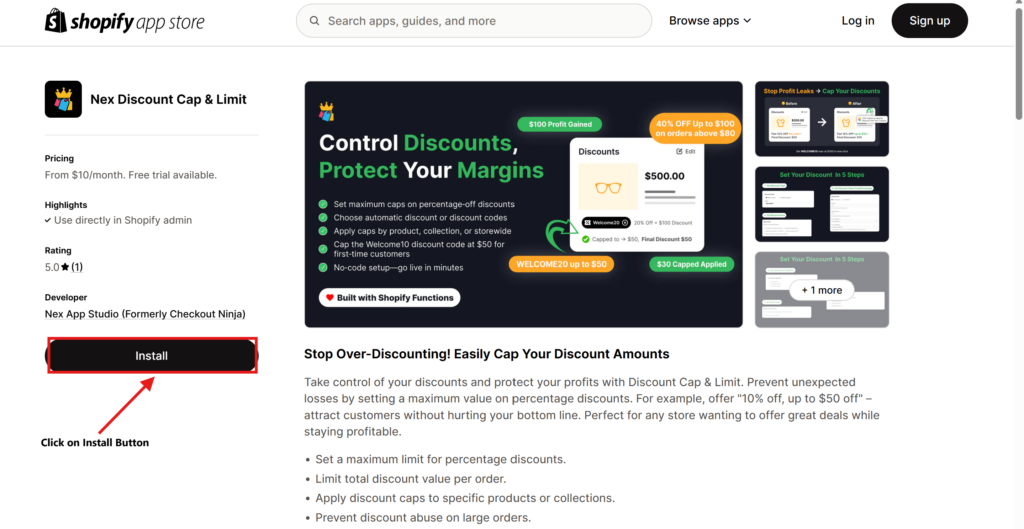
Step 1: Install the Nex Discount Cap & Limit App
If you haven’t installed the Nex Discount Cap & Limit app yet, download it from the Shopify App Store. This app is essential for creating advanced Shopify discount rules, including capped percentage discounts, without any coding.
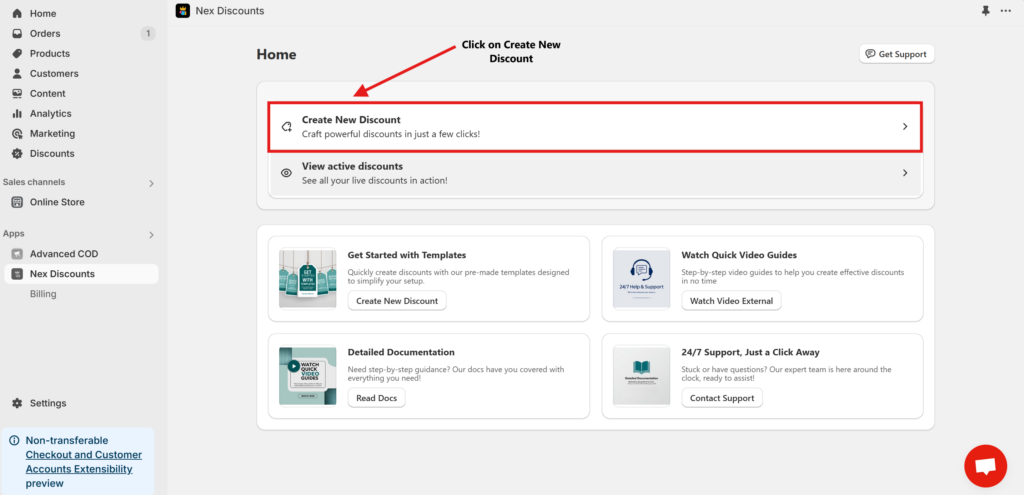
Step 2: Click on “Create New Discount”
- In the Discount King dashboard, click on “Create New Discount”.
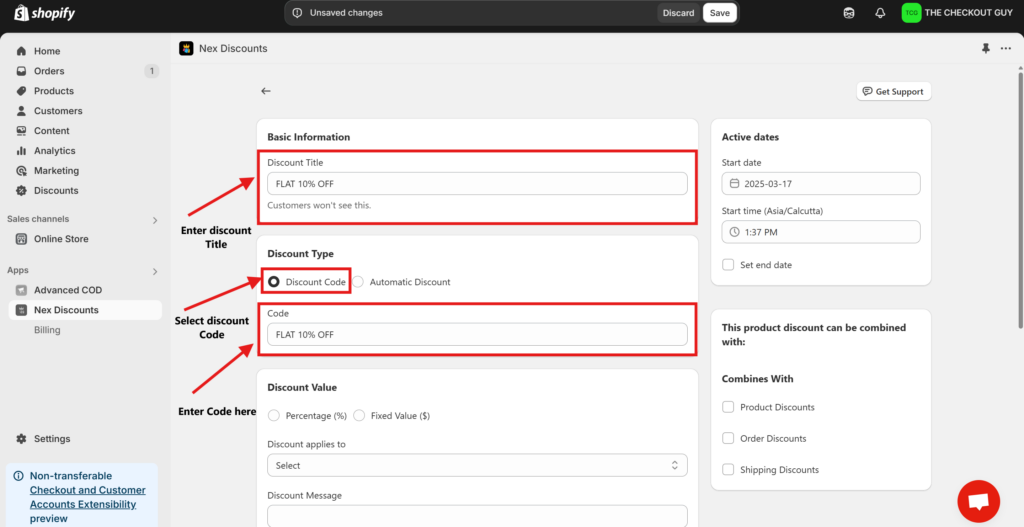
2. Enter Discount Title
- Enter Discount Title
- Select Discount Type
- Enter Discount code
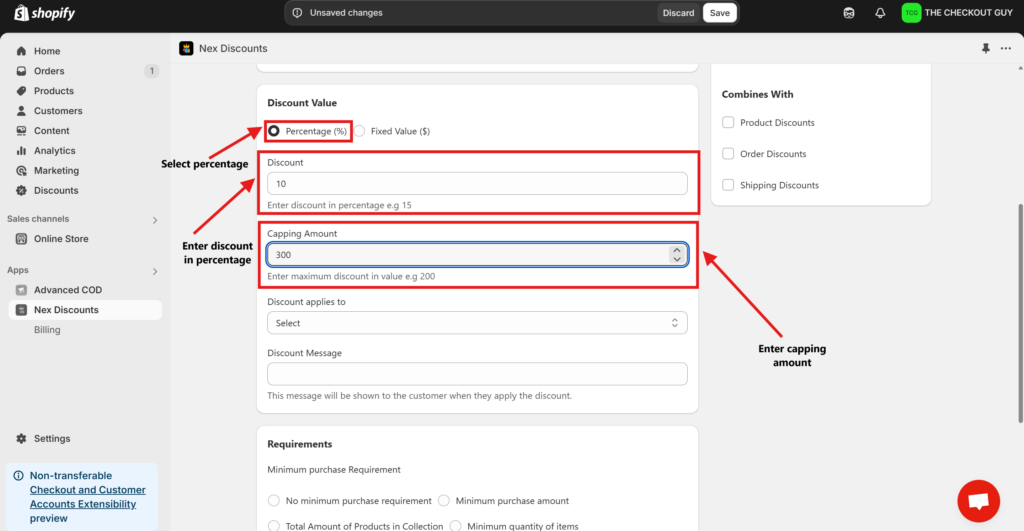
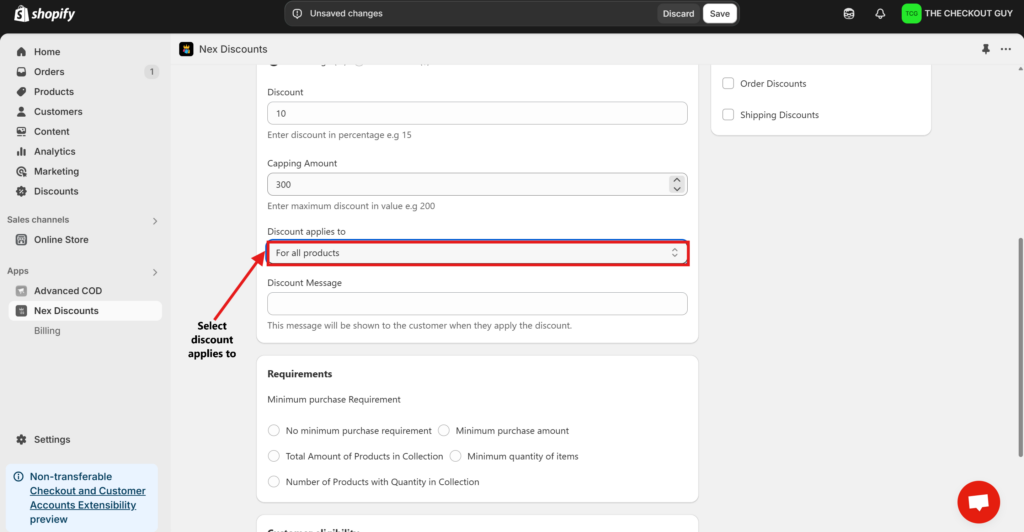
Step 3: Enter Discount Details
- Discount Percentage
- Enter 10%.
- Maximum Discount Cap
- Set the cap to ₹300.
📌 Example Calculation:
- Order Value: ₹2,500 → 10% of ₹2,500 = ₹250 (Allowed ✅)
- Order Value: ₹4,000 → 10% of ₹4,000 = ₹400, but the discount is capped at ₹300 (So only ₹300 applies).
Step 4: Choose Eligible Products
- Applies to All Products → Select this if the discount applies storewide.
- Specific Products or Collections → Choose this if you want to limit the discount to certain items.
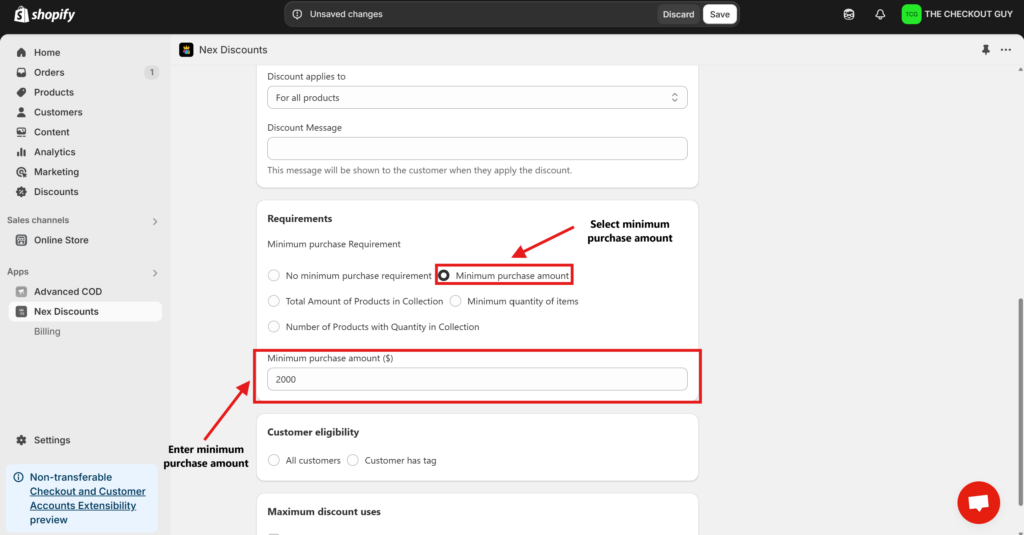
Step 5: Set Minimum Purchase Requirement
Since the discount applies only to orders above ₹2,000:
- In the Minimum Purchase Requirement section, enter ₹2,000.
- This ensures that customers must spend at least ₹2,000 to qualify for the discount.
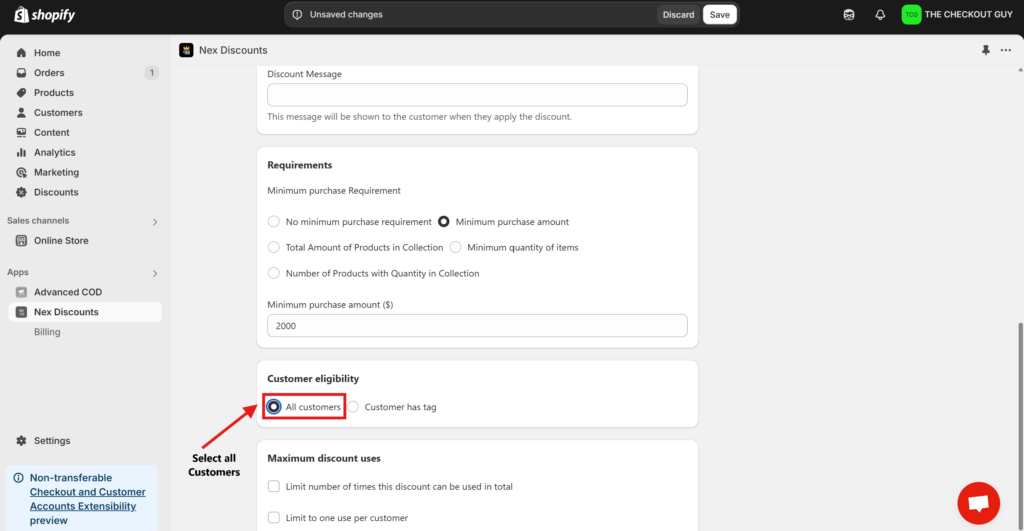
Step 6: Select Customer Eligibility
Decide who can use the automatic discount:
- All customers
- Customers with specific tags
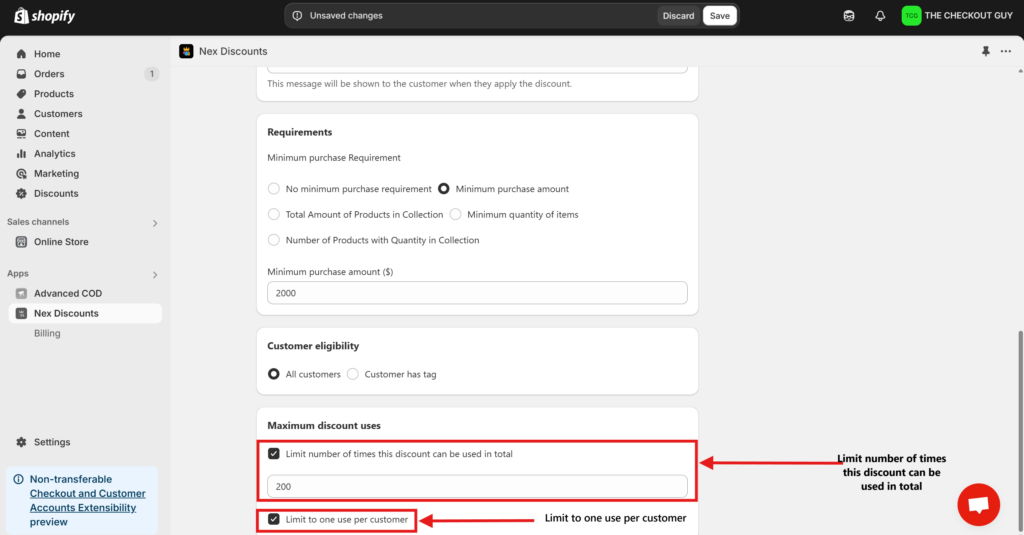
Step 7: Set Discount Usage Limits
- Limit to One Use Per Customer (Recommended to prevent abuse).
- Set Expiry Date if you want the discount to run for a limited time.
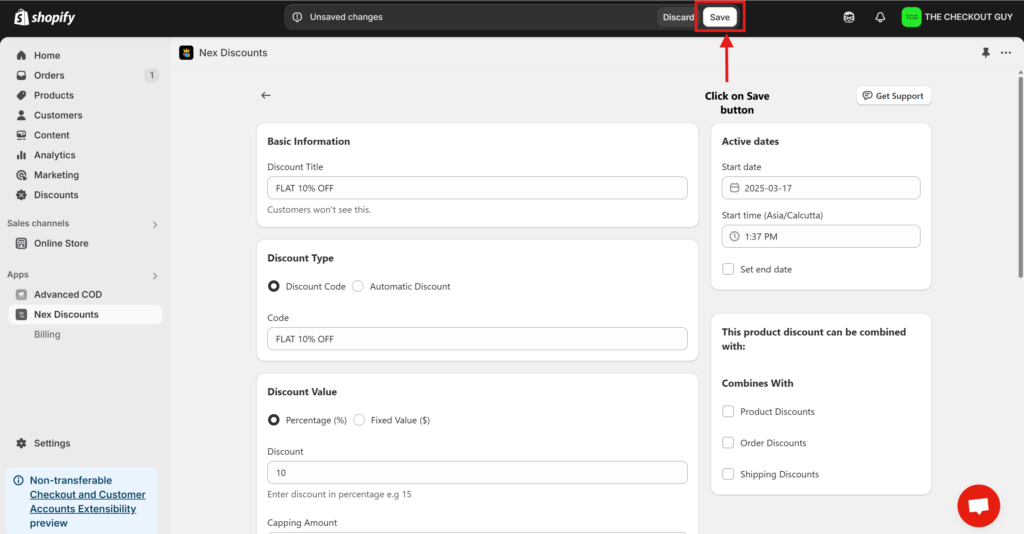
Step 8: Save and Activate the Discount
- Click Save to finalize the discount setup.
- If using a Discount Code, share the code with customers.
- If using an Automatic Discount, it will apply automatically when customers meet the conditions.
Testing the Discount
Test 1: Apply the Discount on an Order Below ₹2,000
- Add a ₹1,500 product to the cart.
- Verify that no discount is applied (as the minimum order value is not met).

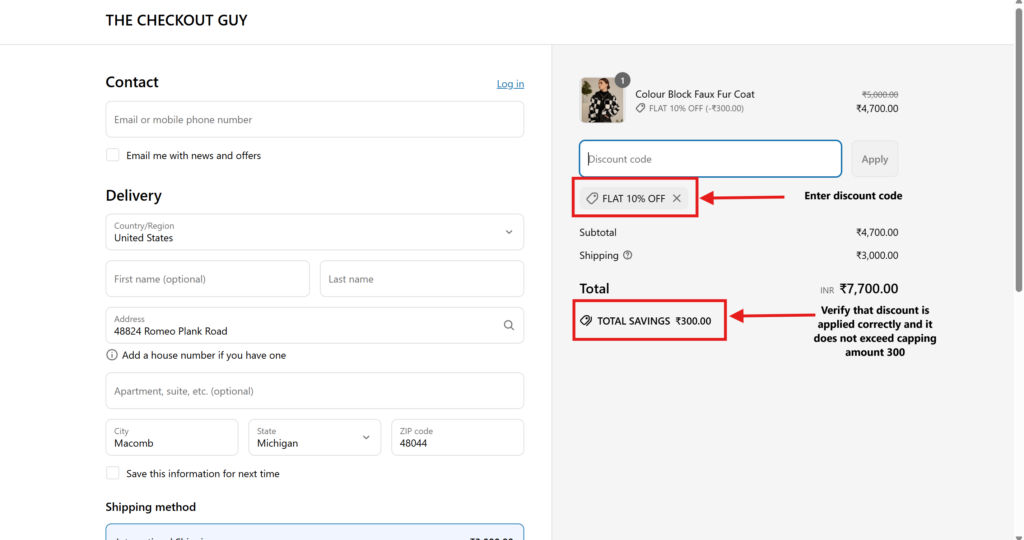
Test 2: Apply the Discount on an Order Above ₹3,000
- Add a ₹4,000 product to the cart.
- Verify that discount is capped at ₹300.
The above given steps help you implement a smart Shopify Discount that not only attracts high value customers but also control your discount spend.
Conclusion
You have successfully set up a 10% discount with a ₹300 cap for orders above ₹2,000 in your Shopify store. This helps boost sales while maintaining profit margins. 🚀
if you are looking to run more effective promotional campaigns, mastering how to set up a Shopify discount with specific conditions like caps and minimum purchase amounts is essential. It gives you more control over your offers and helps create better shopping experiences for your customers.
For further assistance, check the Nex Discount Cap & Limit or contact support. 🎉 Happy selling!
For more such ideas on Shopify discount feel free to check out the Checkout Guy From advanced discount setups to seamless checkout improvements, Checkout Guy offers valuable resources tailored to help e-commerce businesses grow efficiently.
How to Set a Shopify Discount: 10% Off Up to ₹300 on Orders Above ₹2,000